#TGIFun🎈 YOLambda: Running Serverless YOLO Inference
Overview
In this episode of #TGIFun🎈, discover how to deploy any YOLO version 👁️ (YOLOv5-11, and beyond) on AWS Lambda using the AWS SAM CLI.
Deploying YOLO on Lambda delivers an optimal balance of performance, scalability, and cost efficiency. The latest YOLambda version supports version-agnostic deployment — use any YOLO model from YOLOv5 to YOLOv11 and future releases without changing a single line of deployment code.
✨ Key Features:
- 🔄 Version-Agnostic: Compatible with YOLOv5, YOLOv8/9/10/11, and future versions
- 🚀 Serverless: Automatic scaling with AWS Lambda
- 🔧 Configurable: Swap models effortlessly via environment variables
- 📦 ONNX Optimized: Lightning-fast inference with ONNX Runtime
👨💻 All code and documentation is available at github.com/JGalego/YOLambda.
YOLO in Pictures 🖼️
What exactly is YOLO and why should you care? Let’s start with a brief overview.
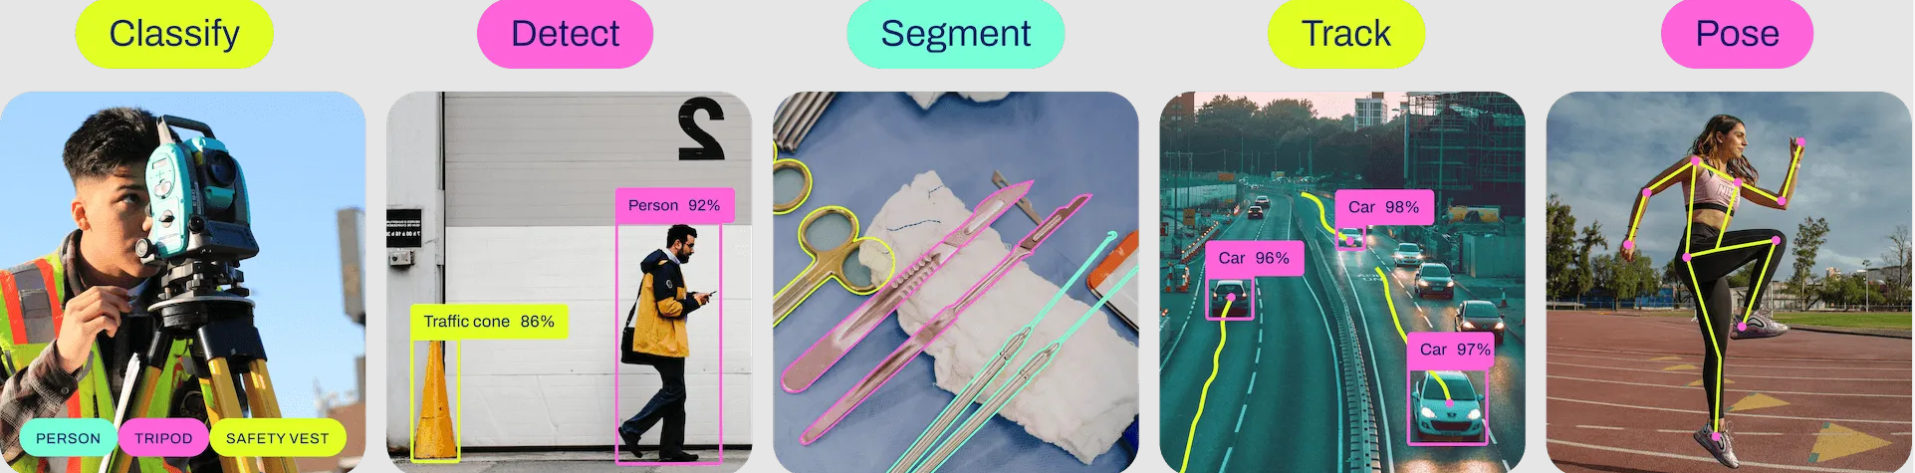
YOLO (You Only Look Once) is a family of state-of-the-art computer vision models that supports multiple tasks.

Newer models build on top of an already long history
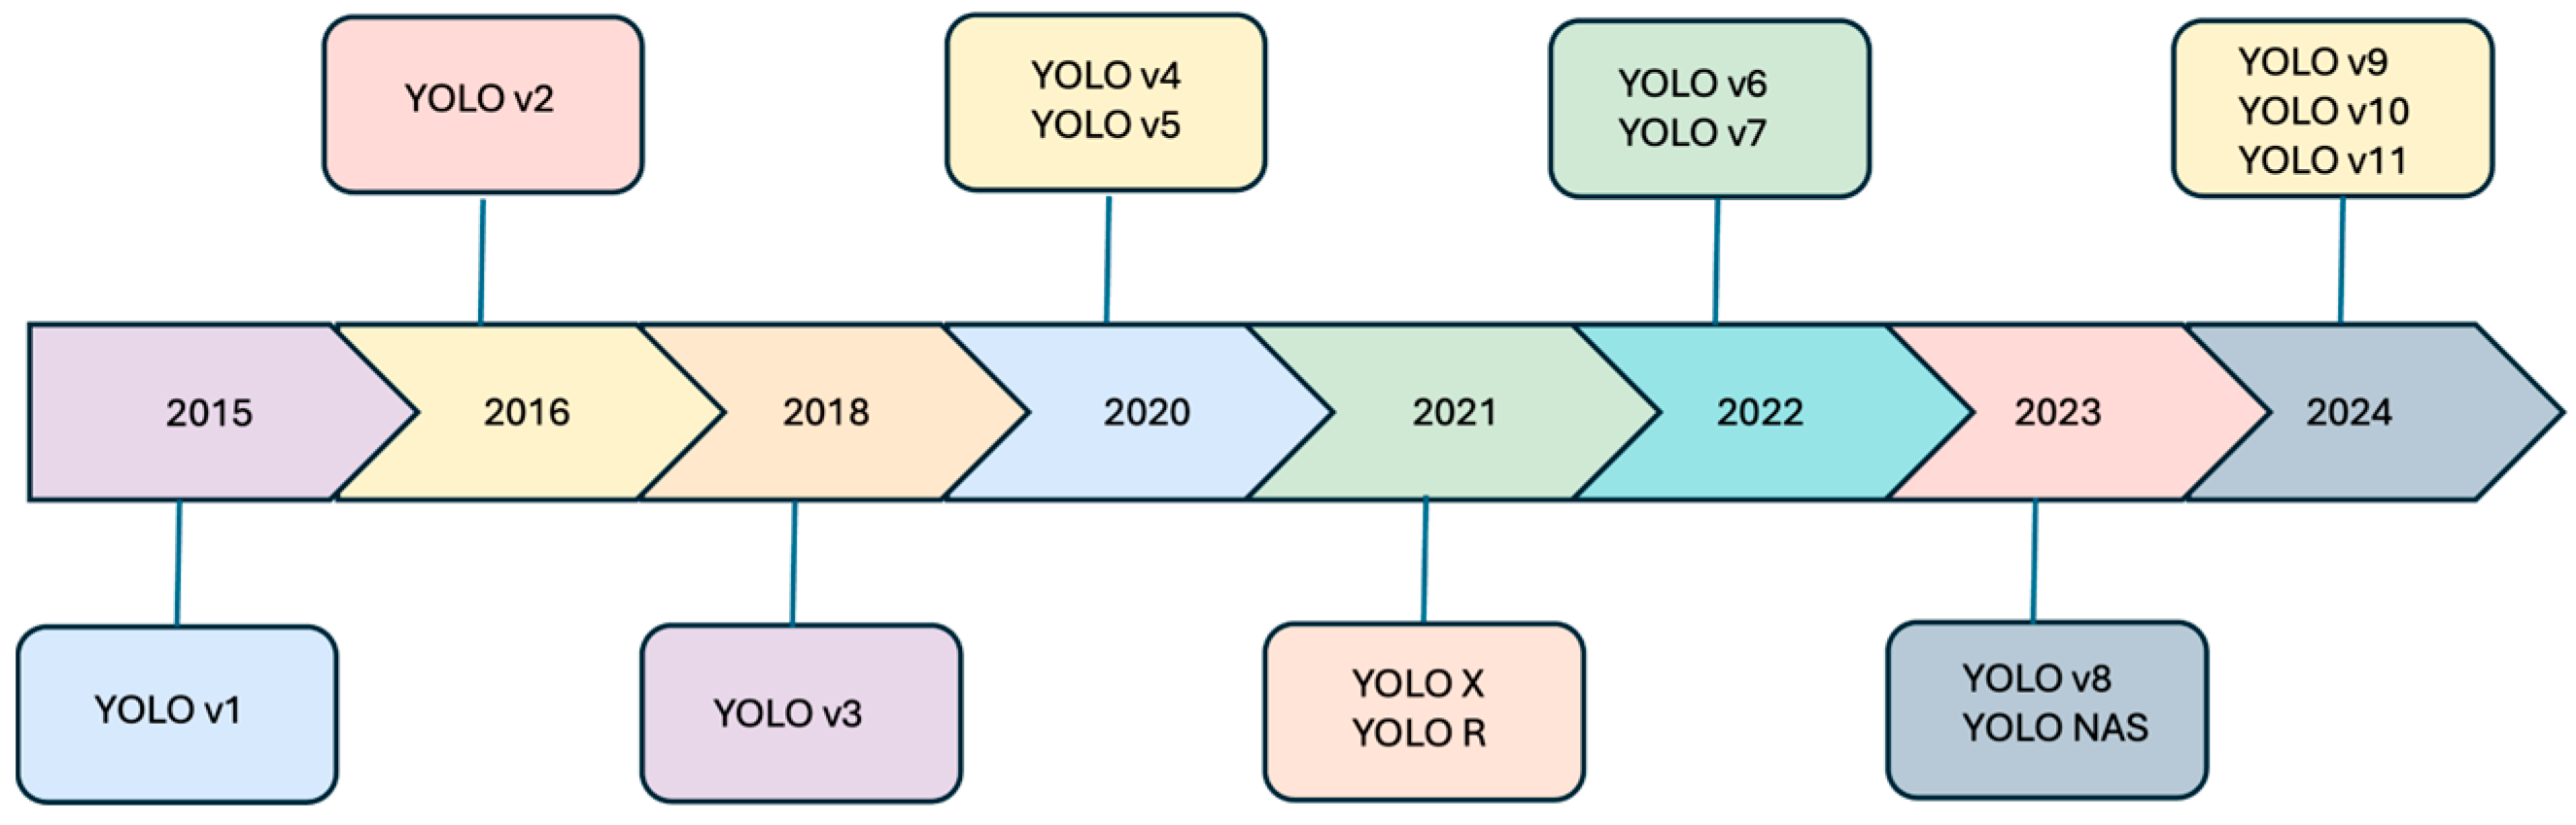
and each new model is designed to be smaller 🤏 and faster ⚡ than previous iterations.
While a full description of the YOLO architecture is beyond the scope of this article, it’s still useful to gain some intuition of what’s happening inside.
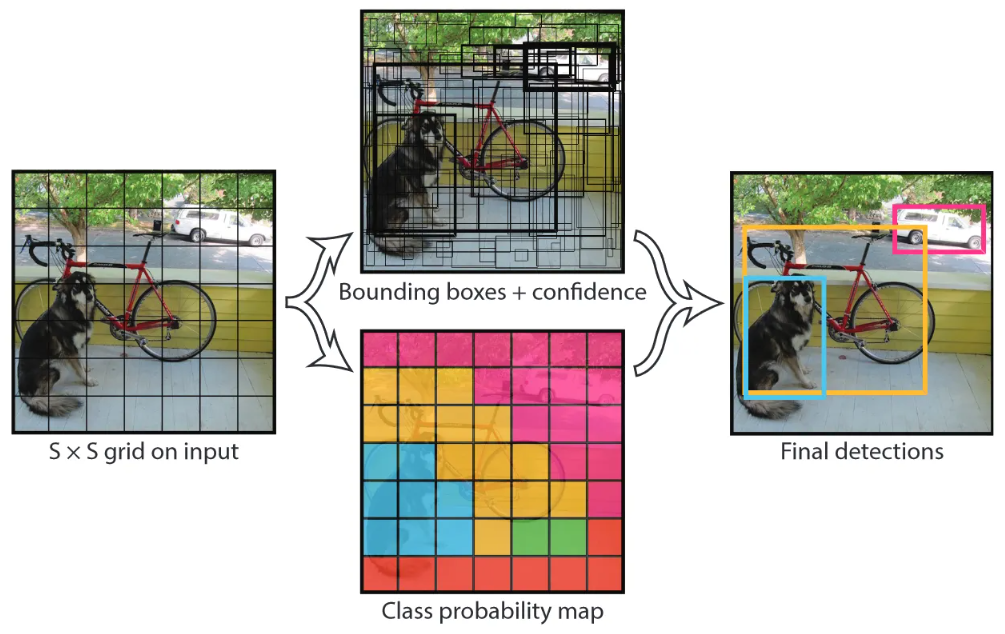
Referring back to the original (YOLOv1) paper, YOLO models essentially work by dividing the input image into a grid, predicting a set of bounding boxes, which are expressed as 2+2-tuples of top-left (x1, y1) and bottom-right coordinates (x2, y2), as well as their associated confidence scores and class probabilities, to generate the final predictions.
Over the years, there have been many improvements such as faster NMS implementations (which stands for Non-Maximum Suppression, in case you’re wondering) or the use of “bag-of-freebies” and “bag-of-specials” approaches (best names ever!) that have made YOLO faster and stronger.
Fortunately, you don’t really need to know (or care) about those implementation details to work on this project.
YOLambda automatically handles the different output formats and architectures across all YOLO versions, from YOLOv5’s format with objectness confidence to YOLOv11’s streamlined output without objectness scores. If you’re interested in the technical details though, I strongly encourage you to read up on the history of YOLO.
💡 If you want to learn more, just scroll all the way down to the References section.
Goal 🎯
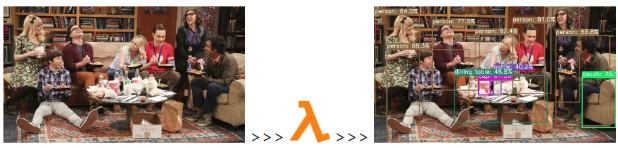
In this project, we’re going to create a simple object detection app that accepts an image 🖼️
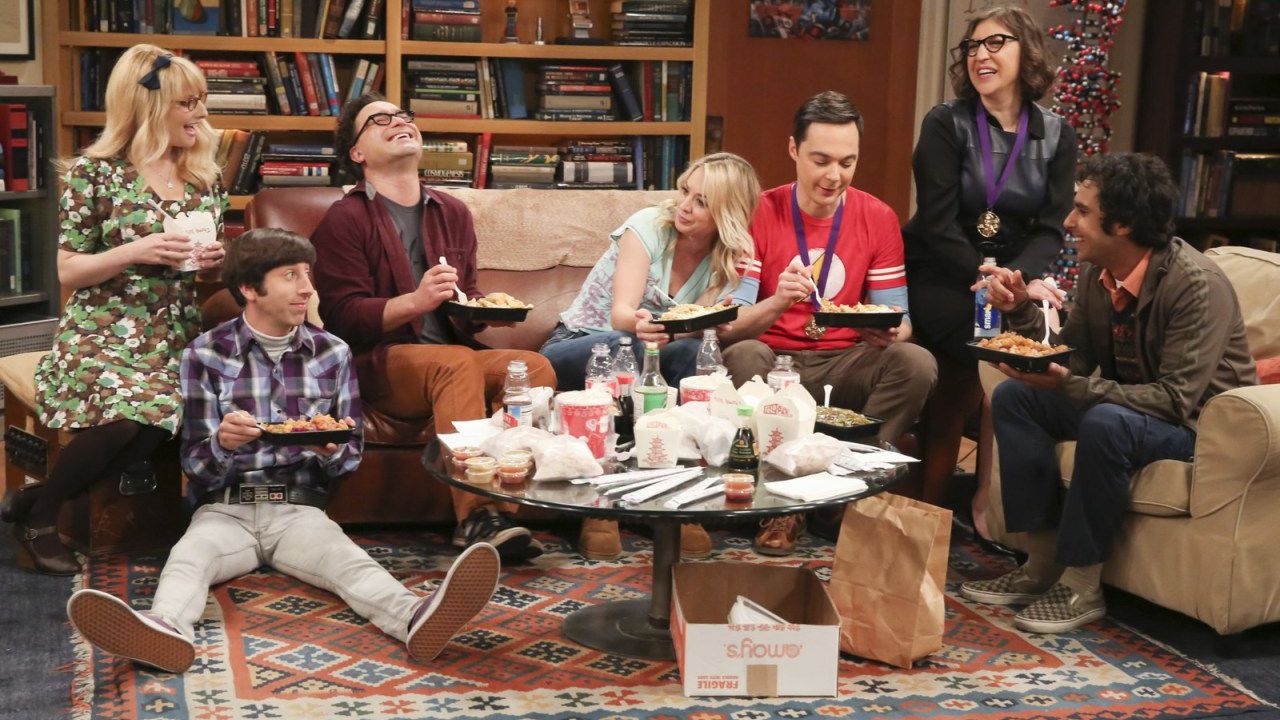
sends it to the YOLO model for inference and returns a list of detected objects such as
[
    {
        "box": [
            962,
            154,
            1247,
            630
        ],
        "conf": 0.8881231546401978,
        "cls": "person"
    },
    {
        "box": [
            67,
            227,
            502,
            711
        ],
        "conf": 0.8832821846008301,
        "cls": "person"
    },
    {
        "box": [
            5,
            45,
            240,
            578
        ],
        "conf": 0.8401730060577393,
        "cls": "person"
    },
    {
        "box": [
            733,
            88,
            936,
            460
        ],
        "conf": 0.809768795967102,
        "cls": "person"
    },
    {
        "box": [
            308,
            98,
            556,
            442
        ],
        "conf": 0.7752255201339722,
        "cls": "person"
    },
    {
        "box": [
            903,
            2,
            1088,
            505
        ],
        "conf": 0.7346365451812744,
        "cls": "person"
    },
    {
        "box": [
            534,
            149,
            769,
            391
        ],
        "conf": 0.6235901117324829,
        "cls": "person"
    },
    {
        "box": [
            632,
            338,
            672,
            467
        ],
        "conf": 0.40179234743118286,
        "cls": "bottle"
    },
    {
        "box": [
            552,
            387,
            614,
            467
        ],
        "conf": 0.617901086807251,
        "cls": "cup"
    },
    {
        "box": [
            1101,
            376,
            1279,
            639
        ],
        "conf": 0.3513599634170532,
        "cls": "couch"
    },
    {
        "box": [
            426,
            364,
            915,
            614
        ],
        "conf": 0.46763089299201965,
        "cls": "dining table"
    }
]
which we can then place on top of the original image
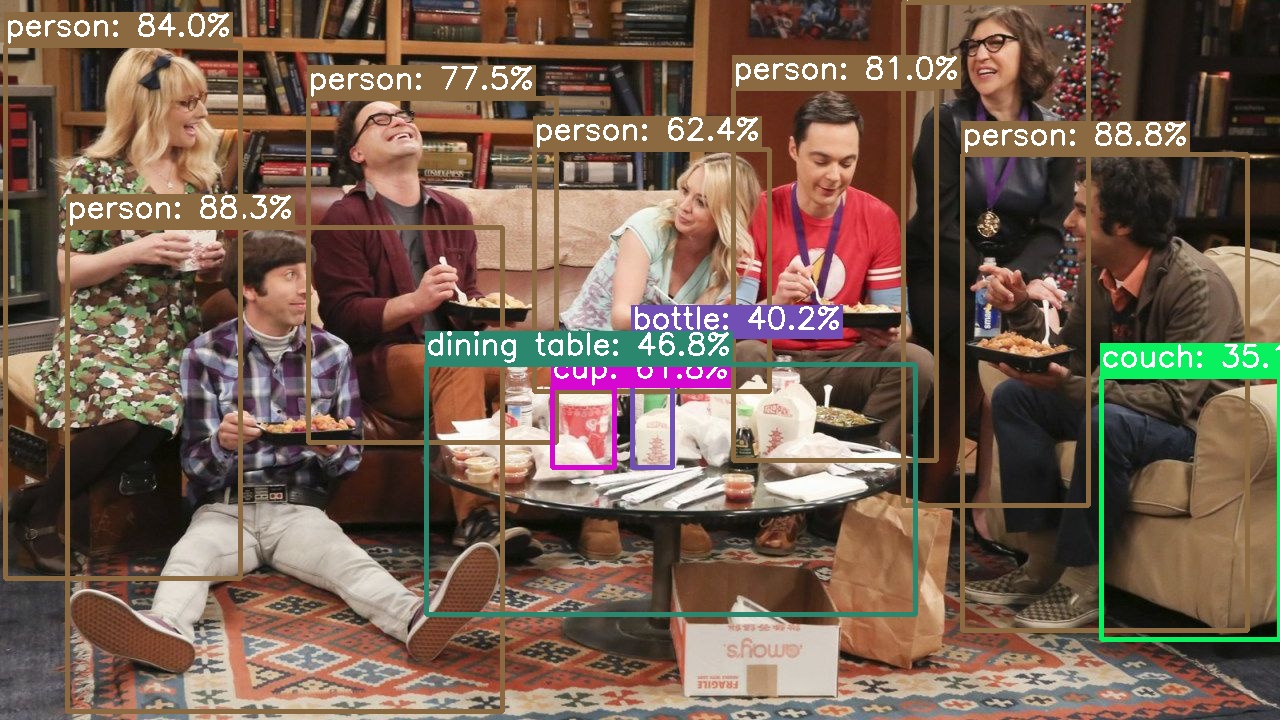
You can use any YOLO model - whether it’s a vanilla YOLOv5, the latest YOLOv11, a fine-tuned model from Roboflow Universe, or your own custom-trained YOLO.
Sounds fun? 🤩 Then buckle up and let’s build it together!
Instructions
Prerequisites ✅
Before we get started, make sure these tools are installed and properly configured:
- 🐍 Conda (preferred) or vanilla Python (version
>=3.9) - 🐳 Docker
- 🐿️ AWS SAM
- (Optional) JQ for JSON processing in the terminal
# Python / Conda
python -V
conda info

# Docker
docker info

# AWS SAM
sam --info

# JQ
jq -h
Steps 📜
Let’s start by cloning the repository
git clone https://github.com/JGalego/YOLambda
cd YOLambda
Following best practices, I recommend you create a Conda environment, virtualenv or similar to keep everything isolated
# Create a new environment and activate it
conda env create -f environment.yml
conda activate yolambda
Once the environment is active, we can kick things off and install the project dependencies
pip install -qr requirements.txt
Now comes the exciting part - converting your YOLO model to ONNX format. Depending on the YOLO version you’re using, the export commands will differ slightly.
YOLOv8-11:
# Export any Ultralytics model to ONNX (replace with your preferred model)
yolo mode=export model=yolov11n.pt format=onnx dynamic=True
# Or try: yolov8s.pt, yolov9c.pt, yolov10n.pt, etc.
YOLOv5:
# Clone YOLOv5 repo if not already available
git clone https://github.com/ultralytics/yolov5
cd yolov5

# Export PT -> ONNX
python export.py --weights yolov5s.pt --include onnx
cd ..
💡 All YOLO series offer models in different sizes (
nano »small »medium »large »xl) and specialized tasks (segmentation,poseestimation, &c.). The version-agnostic design means you can swap between any of them seamlessly. If you want to try a different model, please refer to the official documentation (see e.g. YOLOv11 > Supported Tasks and Modes
As an optional step, we can simplify and optimize the ONNX model for better performance:
# (Optional) Simplify ONNX model
# https://github.com/daquexian/onnx-simplifier
onnxsim your_model.onnx your_model.onnx

# (Optional) Optimize ONNX model
# https://github.com/onnx/optimizer
python -m onnxoptimizer your_model.onnx your_model.onnx

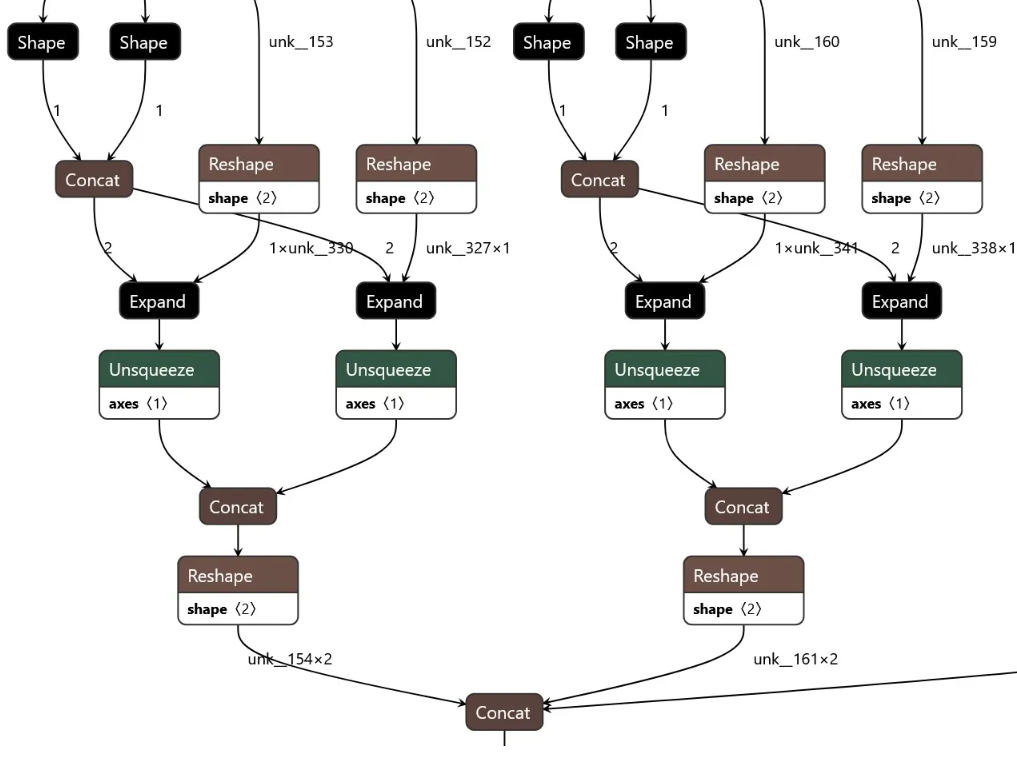
Once this is done, you can look “under the hood” and check out the computational graph with tools like Netron:
# 🌐 Browser
# Visit https://netron.app/

# 💻 CLI
# https://github.com/lutzroeder/netron
netron -b yolov8n.onnx
Now let’s set up the model for deployment. YOLambda expects your model to be named yolo.onnx in the models folder, regardless of the YOLO version:
# Move model to the models folder and rename it
mkdir -p models
mv your_model.onnx models/yolo.onnx
You can customize the model path by setting environment variables:
# In template.yaml, add to your function's Environment section:
Environment:
  Variables:
    YOLO_MODEL_PATH: /opt/your_custom_model.onnx  # Default: /opt/yolo.onnx
Now, we’ll use the AWS SAM CLI to build and deploy the YOLO app:
# 🏗️ Build
sam build --use-container

# 🚀 Deploy with custom parameters (optional)
sam deploy --guided

# OR deploy with specific model path
sam deploy --parameter-overrides YoloModelPath=/opt/yolov11n.onnx
While in development, you can test your app by using SAM’s local mode:
# Create event
echo {\"body\": \"{\\\"image\\\": \\\"$(base64 images/example.jpg)\\\"}\"} > test/event.json

# Invoke function
sam local invoke --event test/event.json
The updated YOLambda automatically detects and handles different YOLO output formats:
- YOLOv5/v8/v9:
[x, y, w, h, obj_conf, class1, class2, ..., class80](85 features) - YOLOv11:
[x, y, w, h, class1, class2, ..., class80](84 features, no objectness) - YOLOv10: custom format handling
- Future versions: automatic format detection and adaptation
While you wait for the deployment to finish, let’s take a closer look at our template:
AWSTemplateFormatVersion: '2010-09-09'
Transform: AWS::Serverless-2016-10-31
Description: >
  Scaling YOLO Inference with Serverless:
  How to build an object detection app using AWS Lambda and AWS SAM
  Supports any YOLO version (YOLOv5, v8, v9, v10, v11, and future versions)

Parameters:
  YoloModelPath:
    Type: String
    Default: '/opt/yolo.onnx'
    Description: Path to the YOLO model file in the Lambda layer

Resources:
  YOLOModel:
    Type: AWS::Serverless::LayerVersion
    Properties:
      LayerName: yolo-models
      Description: YOLO models
      ContentUri: models/
      CompatibleRuntimes:
        - python3.9
        - python3.10
        - python3.11
  YOLOFunction:
    Type: AWS::Serverless::Function
    Properties:
      CodeUri: src/
      Layers:
        - !Ref YOLOModel
      Handler: app.handler
      Runtime: python3.10
      MemorySize: 10240
      Timeout: 60
      Environment:
        Variables:
          YOLO_MODEL_PATH: !Ref YoloModelPath
      FunctionUrlConfig:
        AuthType: AWS_IAM

Outputs:
  YOLOFunctionUrlEndpoint:
      Description: "YOLO Lambda function URL"
      Value:
        Fn::GetAtt: YOLOFunctionUrl.FunctionUrl
Here are a few important things to notice:
-
🔄 Version-Agnostic: the template supports any YOLO model through configurable environment variables and dynamic input/output name detection.
-
🧱 Resources: there’s one for the Lambda function (
YOLOFunction) and another for the YOLO model (YOLOModel) which will be added as a Lambda layer. -
⚙️ Settings: the memory size is set to the maximum allowed value (
10GB) to improve performance, crucial for handling different YOLO model sizes cf. AWS Lambda now supports up to 10 GB of memory and 6 vCPU cores for Lambda Functions for more information. -
🔧 Configuration: the
YoloModelPathparameter allows you to specify custom model paths without code changes. -
🔐 Security: authentication is handled by IAM using AWS Signature Version 4 (SigV4) cf. Invoking Lambda function URLs for additional details.
Once deployment is complete, note down the function URL:
# 📝 Note down the function URL
export YOLAMBDA_URL=$(sam list stack-outputs --stack-name yolambda --output json | jq -r .[0].OutputValue)
echo $YOLAMBDA_URL
You can use tools like awscurl to test the app (awscurl is nice because it handles SigV4-signing for you):
# Create payload
echo {\"image\": \"$(base64 images/example.jpg)\"} > test/payload.json

# Make request using awscurl (handles SigV4 signing)
awscurl --service lambda -X GET -d @test/payload.json $YOLAMBDA_URL

# Pro tip: pretty-print the output by piping it to jq
awscurl --service lambda -X GET -d @test/payload.json $YOLAMBDA_URL | jq '.'
or use the provided test script:
python test/test.py $YOLAMBDA_URL images/example.jpg
If it works, you should see a list of detected objects in the output!
If it doesn’t, here are some common issues and how to troubleshoot them:
Model Loading Issues:
- Ensure your ONNX model is properly exported
- Check that the model path is correct in the Lambda layer
- Verify the model is compatible with ONNX Runtime
Inference Errors:
- Make sure input image format is base64 encoded
- Check confidence and IoU thresholds are appropriate for your model
- Verify your model expects 640x640 input size (or adjust
imgszparameter)
Performance Optimization:
- Use ONNX model optimization tools for better performance
- Adjust Lambda memory allocation based on your model size
- Version-agnostic code automatically optimizes processing for each YOLO format
And that’s it! 🥳 We just crossed the finish line…
So, what’s next? Here are some ideas:
- Try different YOLO versions - test YOLOv5, YOLOv8, YOLOv11, or even custom models
- Explore the code - it’s there for the taking, plus I left some Easter eggs and L400 references in there for the brave ones.
- Build specialized apps - use fine-tuned models for specific domains
- Share with the community - show me what awesome use cases you build!
I hope you enjoyed building this YOLO app with me. See you next time! 👋
This was the first article in the #TGIFun🎈 series, a personal space where I’ll be sharing some small, hobby-oriented projects with a wide variety of applications, I used to publish on the AWS Community Blog. AWS messed up the formatting on the original, so I decided to move it here. Enjoy!
References 📚
Articles
- (Redmon et al., 2015) You Only Look Once: Unified, Real-Time Object Detection
- (Terven & Cordova-Esparza, 2023) A Comprehensive Review of YOLO Architectures in Computer Vision: From YOLOv1 to YOLOv8 and YOLO-NAS
Blogs
- Hosting YOLOv8 PyTorch models on Amazon SageMaker Endpoints
- Intuitivo achieves higher throughput while saving on AI/ML costs using AWS Inferentia and PyTorch
- Scale YOLOv5 inference with Amazon SageMaker endpoints and AWS Lambda
- Speed up YOLOv4 inference to twice as fast on Amazon SageMaker
- Run computer vision inference on large videos with Amazon SageMaker asynchronous endpoints
- Achieving 1.85x higher performance for deep learning based object detection with an AWS Neuron compiled YOLOv4 model on AWS Inferentia
- Streamlining data labeling for YOLO object detection in Amazon SageMaker Ground Truth
Documentation & Tools
-
YOLO Documentation:
- Ultralytics Docs (YOLOv8/v9/v10/v11)
- YOLOv5 Documentation
- YOLO Tasks Overview
- YOLOv11: Latest Version
-
Technical Resources:
- LearnOpenCV: Non Maximum Suppression
- ONNX: Open Neural Network Exchange
- Netron: Neural Network Viewer
- HowTo: deploying YOLOv8 on AWS Lambda (an alternative implementation 💪)